Weld Editor For DVS 1612 And DVS 1608
The GUI for the Weld Editor for DVS 1612 and DVS 1608 assessment, as shown below, is divided into four sections: Table Of Detected Welds, Assessment Parameters, Highlight Welds and Plot Results.
.PNG)
In this section a table with all detected welds, their labels and their corresponding Assessment Parameters is to be found.
The current status of each weld is depicted by the icon in front of the label as described in Weld Editor GUI.
The welds label is composed in the following way:.
"Joint Type|Weld Type|Cross-Section|Thickness Of Plate 1 - Thickness Of Plate 2|Normal Stress MKJ-σ|Shear Stress MKJ-τ|Weld Material|General Material"
There are six different joint types WeldFEM is able to detect:
- B → Butt joint
- C → Corner joint
- O → Overlapped joint
- S → Skew joint
- T → Tee joint
- U → "Universal" joint
Note: The normal and shear stress MKJ-curves are derived from the DVS 1612/DVS 1608 and dependent on the notch and load case of the specific weld.
Note: "Universal" joints are joint types that WeldFEM could not detect unquestionably. Therefore it is recommended to reassign the "Universal" joints to their actual joint type using the Reassign command described in Weld Manager GUI. A first guess for the joint type is neighbouring joint type.
Example: C|a|3.5|5.0-5.0|F3.D|H-|S235J|st
A fillet weld at a corner joint with an effective cross-section value of 3,5 mm. Both of the welded plates have a thickness of 5 mm. F3 has been chosen for the perpendicular normal stress MKJ-σ, D for the parallel normal stress MKJ-σ and H- for shear stress MKJ-τ. The joint plates are made out of S235J.
In this section the Assessment Parameters are specified which will affect the results for each weld.
For changing any parameters the particular weld has to be selected in the table on the left-hand side.
In total five different Assessment Parameters can be specified: User Defined Cross-Section Value [mm], Normal Stress MKJ-σ, Shear Stress MKJ-τ, Stress Resistance Factor and Weld Material.
Weld Type
Selection of a specific weld type which corresponds to its joint type.
Note: WeldFEM will automatically offer weld types which correspond to the detected joint type in the first place. If WeldFEM does not recognize the joint type correctly and thus also the weld type, it is still possible to set up a Weld Type which does not correspond to the detected joint type. This is realised by selecting more in the drop-down-menu.
User Defined Cross-Section Value [mm]
Altering the cross-section value in millimetres for the weld. In case this value is to low or high, WeldFEM will revise it to its closest boundary value.
Normal Stress MKJ-σ
Selection of another MKJ-curve for normal stress which fits the the actual notch case better.
Note: Once welds are detected, WeldFEM will first assign them the most conservative MKJ-curves. The different MKJ-curves can be found in the tables from the appendix B (DVS 1612:2014-08; DVS 1608:2011-09).
Note: Button  displays the weld quality information which correspond to the selected weld type and MKJ-curves for normal stress components.
Shear Stress MKJ-τ
Selection of another MKJ-curve for shear stress which fits the the actual notch case better.
Note: Once welds are detected, WeldFEM will first assign them the most conservative MKJ-curves. The different MKJ-curves can be found in the tables from the appendix B (DVS 1612:2014-08; DVS 1608:2011-09).
Stress Resistance Factor
Selection of another Stress Resistance Factor between the values 0,5 and 1. The Stress Resistance Factor is used to lower the fatigue strength values, similar to the safety factors.
Weld Material
Selection of a weld specific material, in case it differs from the parent material.
Design State
Changes the status icon of the weld. It's not a parameter, but rather an indicator for signaling which welds have already been edited and which of them are in their conclusive state.
Note: WeldFEM will automaticall swap the Design State from Default to Changed as soon as changes to the weld have been defined.
Once a weld has reached its final editing state, the Design State can be set manually to Consistent (e.g. with the manufacture drawing) for a better overview in the weld table.
Apply For Active Weld
Transfers the current Assessment Parameters settings to the active weld.
Delete Selected Weld
Removes the active from the assessment.
This section offers two different highlight methods to visualise welds and weld-groups in the actual FE-model.
Weld
Highlights the active weld (spring-elements representing the weld will be highlighted).
Group
Highlights the group of plate elements which are used to assess the active weld.
Example: Tee joint (no highlighting) 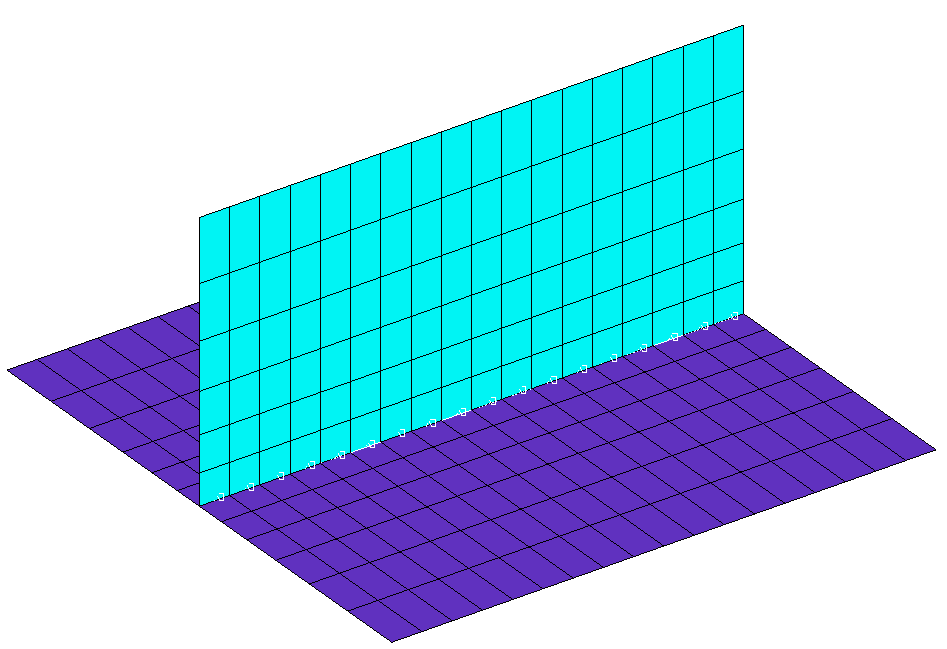
Tee joint (weld highlighted) 
Tee joint (group highlighted) 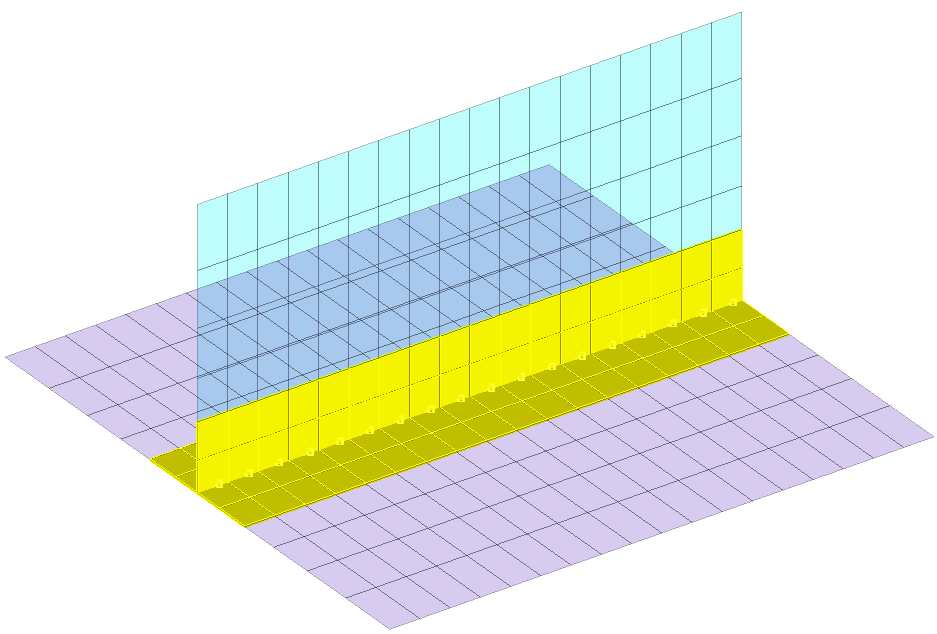
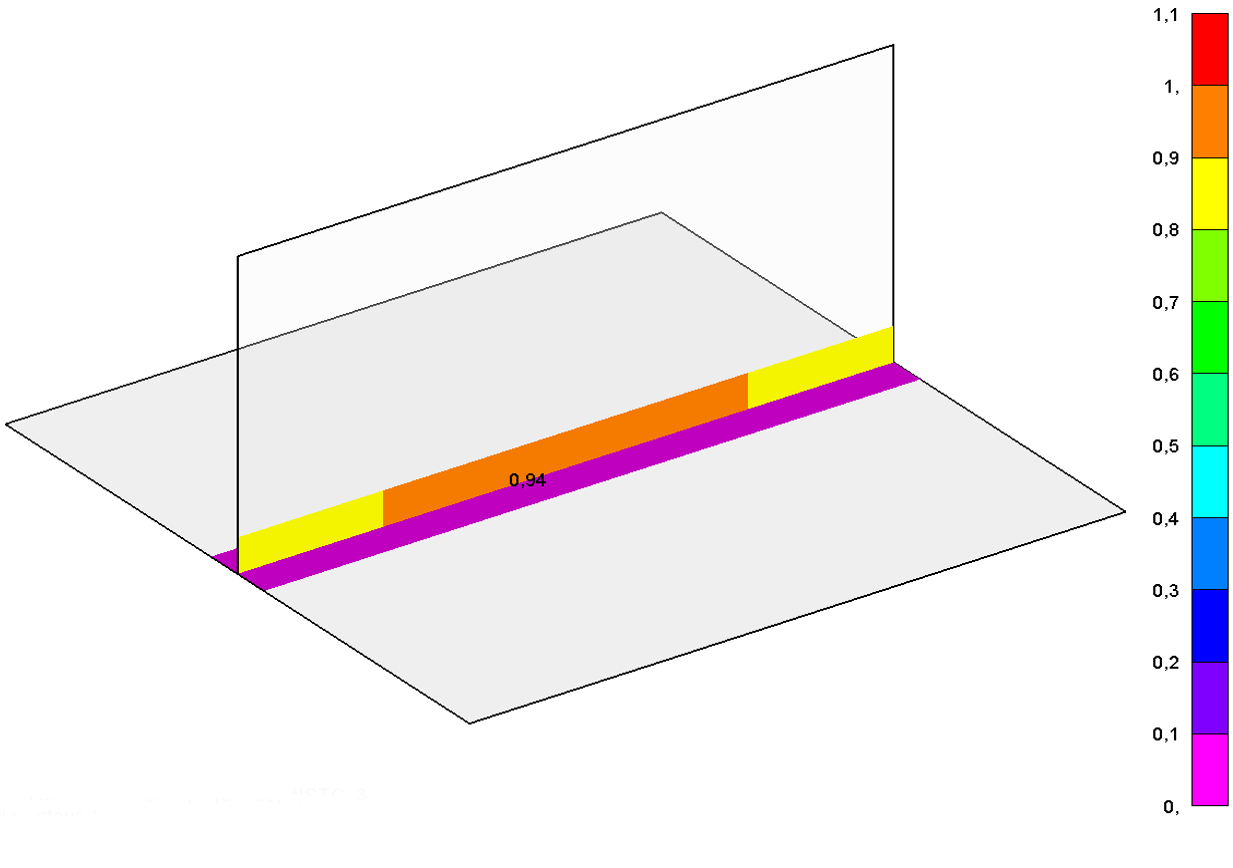
This section offers two functions to visualise the assessment results for either the static assessment or the fatigue assessment in the actual FE-model.
STC
Displays the results for the static assessment of the active weld.
FAT
Displays the results for the fatigue assessment of the active weld.
Note: The way the results are displayed depends on the settings that have been made in the Weld-Detection-GUI (see Weld-Detection GUI).
For the example shown below, the default settings were left unchanged, i.e. Detailed Evaluation is unchecked.
Example: Tee joint (no result plot requested)
Tee joint (STC-Results/FAT-Results)